
A DIY balcony compost bin is one of the easiest things you can set up at home if you want free fertilizer, healthier plants, and a cleaner kitchen without waste piling up.
The whole idea is simple: you take your kitchen scraps, layer them with dry materials, let them break down slowly, and in a few weeks, you’ll get dark, crumbly compost that will improve almost every plant you grow on your balcony.
This works even if you have a tiny apartment balcony, because composting doesn’t need a huge space.
You only need the right container, good airflow, correct layering, and somewhere to place the bin where it stays safe from rain.
What You Need for a Balcony Compost Bin
1. Two or Three Plastic Buckets (10–20 liters each)
Try to get thick plastic buckets with lids. You’ll drill holes for airflow, so make sure they’re sturdy.
Buckets are better than compost bags because:
- They control moisture better.
- You can stack them.
- They don’t fall over easily on windy balconies.
- Easy to clean and reuse.
This is exactly the type of recycled-container setup I often use for balcony gardening, too, just like bottles and trays mentioned in other DIY balcony projects.
2. A Hand Drill or Heated Screwdriver
You only need this for making air holes and drainage holes.
If you don’t have one, heat a small nail/screwdriver on the stove and poke holes carefully.
3. Browns (Carbon-rich materials)
These keep the compost airy and smell-free.
- Dry leaves
- Shredded cardboard
- Paper towels
- Cocopeat
- Sawdust (very little)
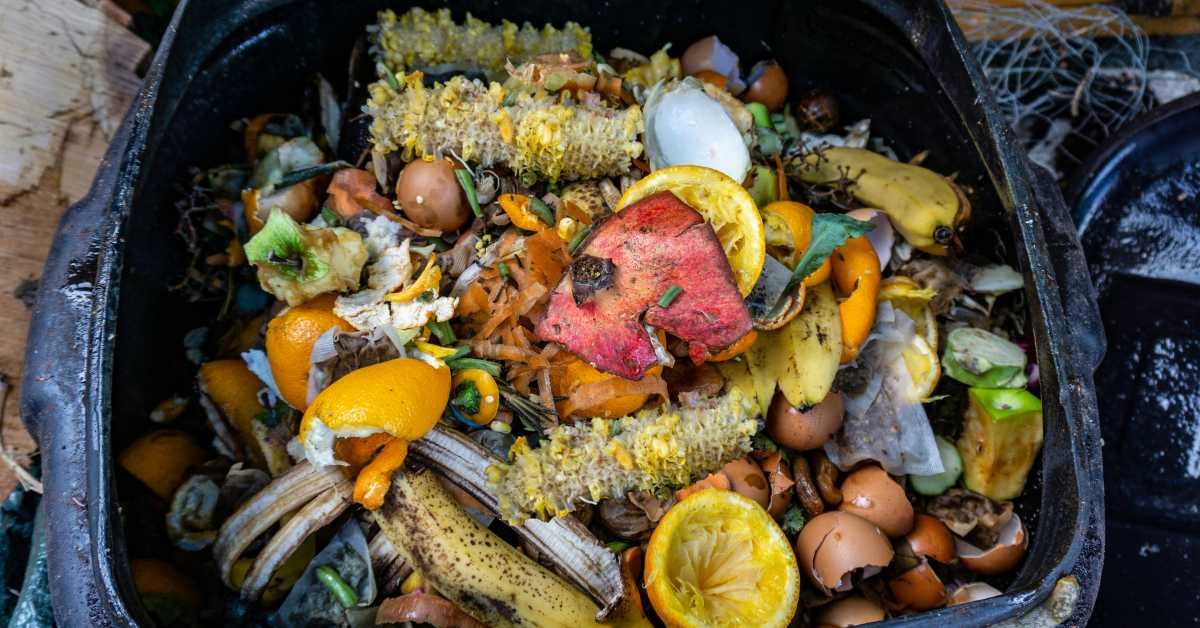
4. Greens (Nitrogen-rich materials)
These are your kitchen scraps.
- Vegetable peels
- Fruit peels
- Coffee grounds
- Tea leaves
- Green leaves
- Herb stems
- Spoiled veggies
Avoid meat, dairy, and oil, because they smell and attract pests.
5. A Small Bowl of Finished Compost or Soil
This boosts the compost with natural microbes.
If you don’t have any, use a handful of old potting soil from your balcony. It works fine.
You can learn what type of soil is best for plants in your balcony garden here: Best Soil for Balcony Plants.
How to Build Your DIY Balcony Compost Bin (Bucket System)
Here’s the exact method that works on balconies without causing a mess or smell.
1: Prepare the Buckets
Take two buckets if you want small-scale composting, or three buckets if your family produces more kitchen waste.
Do this:
- Make 8–12 small holes around the sides (for airflow).
- Make 4–5 holes on the lid (for ventilation).
- Make 3 holes at the bottom of only the top bucket (for leachate drainage).
Stack the top bucket over the second bucket so that any liquid drips below.
The bottom bucket is your collector bin. The top bucket is your compost maker.
2: Add Your Base Layer (Very Important)
At the bottom of your composting bucket:
- Add a 2-inch layer of dry leaves or shredded cardboard.
- Add one handful of soil or old compost.
This will help in balancing moisture, and it will also keep pests away.
3: Layer Greens and Browns
This is the main part of composting:
- You have to add one bowl of kitchen waste (greens).
- Cover it with double the amount of browns.
Let’s say you add 1 cup of scraps, you can cover it with 2 cups of dry leaves, cardboard, or cocopeat.
This keeps the compost from smelling and makes it break down faster.
Why?
Because greens contain nitrogen, and browns contain carbon.
If your mix stays too “wet”, it stinks.
If it stays too “dry”, it stops decomposing.
So, maintain 2:1 browns to greens.
4: Add Microbes to Kickstart It
Once a week:
- Add one handful of soil, old compost, or dry cow dung powder.
This speeds up decomposition naturally and keeps the compost healthy.
5: Keep the Bucket Covered — But Not Air-tight
Put the lid on, but make sure the air holes are open.
Airflow is important because composting is an aerobic process.
Step 6: Stir or Rotate Every 4–5 Days
Just take a small hand trowel or stick and turn the compost a little.
- This adds oxygen
- Prevents bad smell
- Speeds up the breakdown process
If your balcony is tiny and stirring is difficult, then slightly shake/tilt the bucket every few days. It works fine.
Where to Keep Your Compost Bin on a Balcony
Placement is important for smooth composting.
Here are the safest balcony spots:
1. Under a Small Sheltered Area
Somewhere it won’t get direct rain.
2. A Corner With Shade
Heat dries compost too fast.
Shade keeps moisture balanced.
3. Near Balcony Railings (But Not in Full Sun)
Some balconies get harsh sunlight. Strong heat can kill compost microbes.
4. On a Wooden/Plastic Stand
This stops water from collecting under the bin.
You can also combine this with my balcony garden layout if you’re planning a dedicated corner for composting.
What You Can Compost (Greens & Browns List)

To make things very clear, here’s a balcony-friendly compost list.
Greens (Add in moderation)
These release moisture and nitrogen:
- Vegetable scraps
- Fruit scraps
- Tea/coffee
- Fresh leaves
- Soft stems
- Kitchen herb waste
- Spoiled veggies
- Eggshells (crushed)
Browns (Add generously)
These absorb moisture and prevent smells:
- Dry leaves
- Cocopeat
- Sawdust (little)
- Cardboard
- Shredded paper
- Old potting soil
- Coco coir blocks
- Peanut shells
- Corn husks
Avoid These
These attract flies and stink:
- Meat
- Fish
- Dairy
- Oily foods
- Bones
- Citrus in excess (a little lemon peel is okay)
- Wet cooked food
- Plastic stickers from fruit
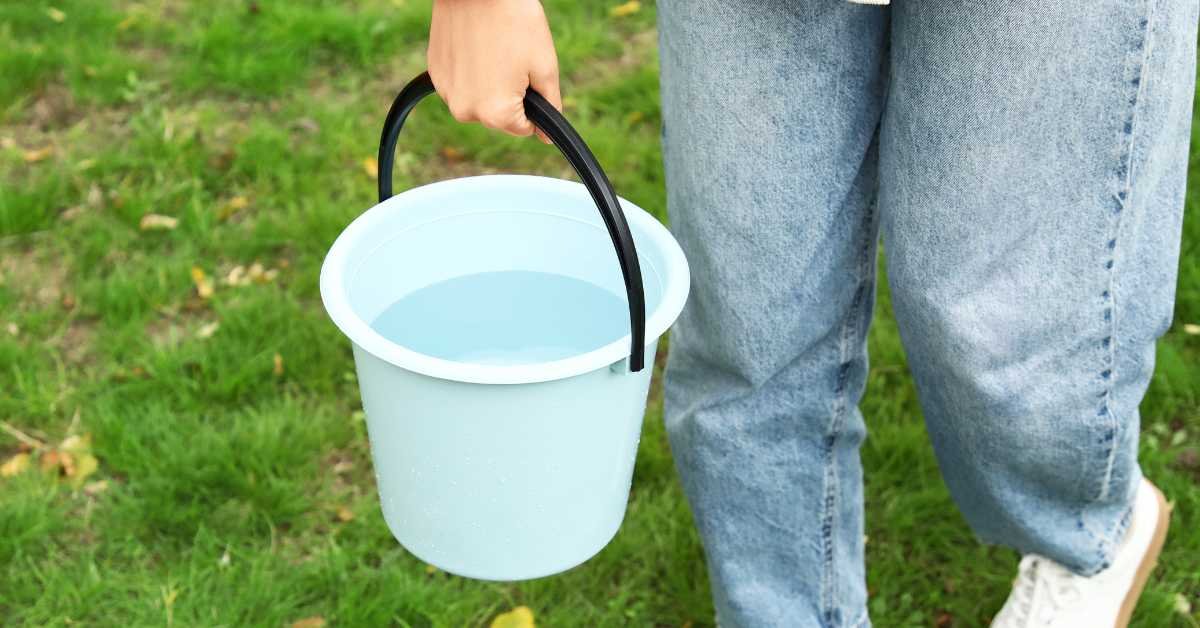
Moisture Control — The Secret to Smell-free Balcony Composting
This is where most beginners mess up.
Your compost should feel like a wet sponge — moist but not dripping.
If your compost is too wet:
- Add more browns
- Stir well
- Leave the lid slightly open for 1–2 hours (never fully open outside)
If your compost is too dry:
- Sprinkle a handful of water
- Add more greens
- Mix well
Compost needs moisture to help microbes work.
How Long Does It Take for Compost to Get Ready?
On a balcony, it takes:
- 4–6 weeks in summer (fast)
- 6–10 weeks in winter (slow)
The compost is ready when:
- It turns dark brown or black
- It looks crumbly
- It smells earthy
- You can’t recognize the original scraps
If you still see some big pieces, just sift them out and return them to the bin for a second round.
How to Use Your Balcony Compost

Once your compost is ready, you can use it in your pots directly.
Here’s how I use it:
1. Mix With Potting Soil (Best Method)
For most balcony plants:
- 60% potting mix
- 30% compost
- 10% cocopeat/perlite
This gives plants nutrients + drainage.
Great to combine with tips from: Best Soil for Balcony Plants.
2. Use as Top Dressing
Just add a 1–2 inch layer of compost on top of the soil every 45–60 days.
Plants like spinach, mint, coriander, lettuce, and smaller balcony herbs respond very fast.
If you grow herbs, try my guide on Best Herbs for Balcony Garden.
3. Make Homemade Compost Tea
This is optional but powerful.
- Take 1 cup of compost
- Mix in 3–4 liters of water
- Let it sit for 24 hours
- Strain and use for watering
This boosts vegetables like chilies, tomatoes, fenugreek, and leafy greens.
For vegetable ideas you can grow with your compost: Best Vegetables for Balcony Garden.
Where a Balcony Compost Bin Helps the Most

1. If you grow vegetables
Leafy greens, coriander, mint, chilies — they respond extremely well when you add fresh compost.
2. If you garden seasonally
Spring, summer, fall, and winter compost helps with:
- Nutrient recharge
- Soil structure improvement
- Better drainage
For seasonal care, your readers may find these related:
3. If your balcony soil is poor
Balcony potting mixes often get compacted.
Compost can fix that naturally.
Common Mistakes When Composting on a Balcony
Based on how many people struggle with drainage, airflow, and moisture in small balcony gardening systems, here are the mistakes you want to avoid:
- Too Many Greens → Bad Smell: Add more browns + stir.
- Bin Not Getting Airflow: Add more holes.
- Rainwater Getting Inside: Keep the bin under shade.
- Adding Cooked Food: Only raw peels, coffee, tea, and leaves.
- Overfilling the Bucket: Keep 3–4 inches empty on top for airflow.
- Not Mixing for Weeks: Stir once a week.
Leachate Management (Liquid That Drips Down)
If you’re using a stacked bucket system, some brown liquid will drip down into the lower bucket.
This liquid is called compost leachate.
How to use it?
- Dilute 1:10 with water.
- Water your plants once every 2–3 weeks.
Don’t use leachate undiluted, because it’s strong.
How Many Compost Bins Do You Need on a Balcony?
Here’s a simple thumb rule:
- 1–2 people → 1 compost bin
- 3–4 people → 2 compost bins
- 5+ people → 3 bins
This keeps the rotation easy:
- One bin composting
- One bin accepting new waste
- One bin finishing
How Compost Helps the Entire Balcony Garden
When your compost matures, it does three things:
1. Improves Drainage
Very helpful if your balcony pots suffer from waterlogging during rainy months.
You can also check my guide: Balcony Garden Drainage Solutions.
2. Adds Nutrients for Fast Growth
Perfect for vegetables like spinach, coriander, and herbs (similar to how they thrive in loose, nutrient-rich recycled containers).
3. Reduces Soil Compaction
Your plants breathe better as it allows roots to spread deeper.
Conclusion
A DIY balcony compost bin is one of the best upgrades you can make for your small garden. It cuts down your kitchen waste, gives you free organic fertilizer, and keeps your balcony plants healthier long-term.
And once you set it up properly with the right airflow, moisture, and layering, it just works on its own.
You won’t need expensive tools, and you don’t need a huge space either — even a tiny corner of your balcony is enough.
If you follow the steps I explained, your compost will stay smell-free, break down properly, and you’ll always have a fresh supply of nutrient-rich compost to use for vegetables, herbs, and flowers.
Use it in your potting mix, top-dress your plants every few weeks, and you will see the difference in their growth almost instantly.
This is exactly how you create a self-sustaining balcony garden without spending money on store-bought fertilizers again.
FAQs
Does a balcony compost bin smell or attract insects?
If you maintain the 2:1 ratio of browns to greens, your compost won’t smell at all. Smell happens only when it gets too wet or too many kitchen scraps are added at once.
Just cover every layer of food waste with dry leaves or cardboard, and stir the compost weekly.
For insects, keeping the lid closed and adding a handful of soil once a week will keep pests away. Composting is completely clean when done right.
How much compost does one small balcony bin produce?
A 10–20 liter bucket usually gives you 3–5 kg of finished compost every cycle (about every 5–8 weeks, depending on weather).
This is more than enough for a small balcony garden.
You can mix it into potting soil or use it as a top dressing for herbs, chilies, tomatoes, spinach, coriander, and leafy vegetables.
If your family produces more waste, just keep two bins rotating — while one is composting, the other one collects fresh scraps.
Can I compost during winter or very hot summers on a balcony?
Yes, you can compost year-round. In the summer season, composting works much faster, and that’s because heat speeds up decomposition. However, make sure your bin stays in shade so it doesn’t dry out.
In winter, composting slows down, but it never stops; you just have to stir less often and keep moisture balanced.
If temperatures drop too low, place the bin near a wall or corner where it gets a little warmth.
Either way, composting continues smoothly with basic care, and you’ll still get usable compost, just a little slower in winter.

I’m Abraham creator of Balcony Gardening Ideas. I share balcony gardening tips, DIY projects, and hands-on plant care guides based on my own balcony garden experience. I grow vegetables, herbs, and flowers using organic methods and simple setups anyone can follow.