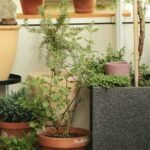

If you’re planning a balcony garden or already have one, but every time it rains, your floor stays wet or plants look tired, then you need to fix the drainage system first.
And don’t worry, I’ll give you complete balcony garden drainage solutions.
Because no matter what plants or pots you choose, if water doesn’t drain properly, your plants will face root rot, yellow leaves, or leakage problems in your balcony.
So, I’ll tell my tasted solutions like what drainage setup really works, how to make a system easily at home, and how to keep it simple so you don’t keep cleaning a muddy mess in your balcony.
Why You Must Have a Good Drainage System in a Balcony Garden
Balcony gardens don’t have natural ground to soak water (unlike a backyard). So, you want every drop to go.
Without drainage, your soil stays soggy, oxygen can’t reach the roots, and plants will slowly die.
A good drainage system:
- Will let extra water flow out quickly
- Keeps soil soft and airy
- It protects roots from rotting
- Prevents leaks and stains on balcony tiles
So you bring new plants, first make sure your drainage setup is ready. That’s the foundation for every healthy balcony garden.
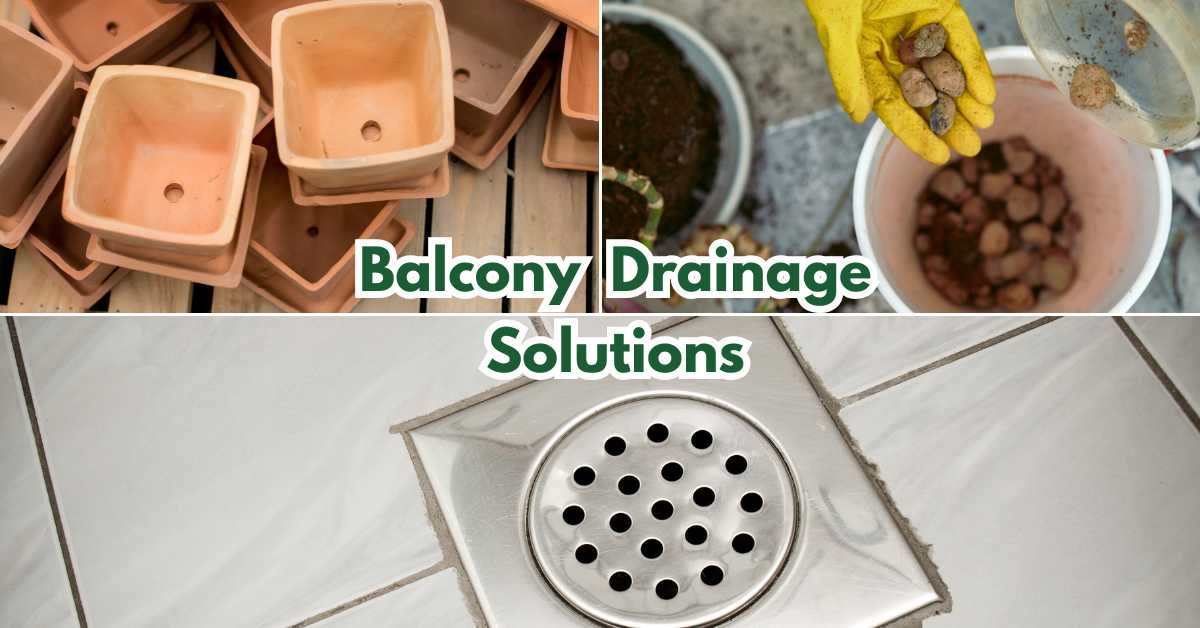
As a balcony garden, here are my 18 recommendations
1. Always Choose Pots with Drainage Holes

Simple rule — no drainage holes, no plants.
Every pot must have holes at the bottom so water can flow out. If you bought pots without them, just drill or make 2–3 holes yourself.
When I use any pot or container that doesn’t have a bowl, I use a screwdriver, or heat a nail for plastic pots.
When you do that, make sure the holes are not too big so the soil doesn’t escape.
Quick Hack: I place a small mesh over the holes before adding soil. It will keep soil inside but let water drain easily.
Best pot materials for drainage:
- Clay or terracotta pots – naturally breathable, ideal for herbs and flowers.
- Plastic pots – good if your balcony gets strong sun or wind; hold moisture a little longer.
- Fabric grow bags – perfect for vegetables; they never trap water.
2. Add a Drainage Layer at the Bottom
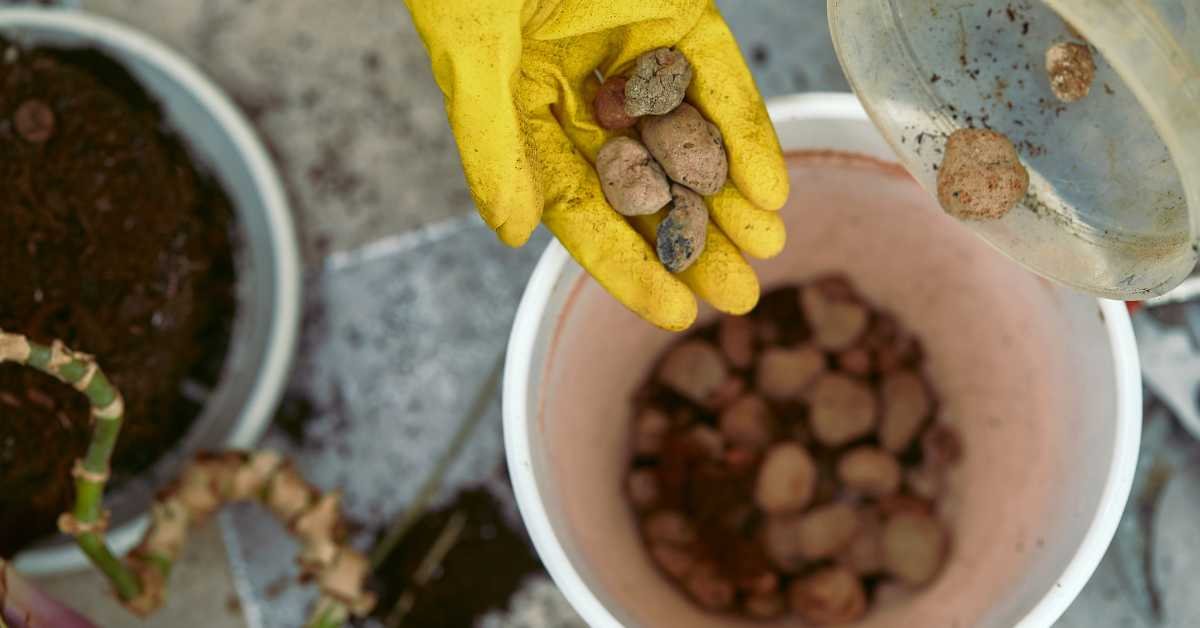
Even with holes, roots can still sit in water if you fill the soil directly. Therefore, add a drainage layer before you add potting mix.
You can use:
- Pebbles, gravel, or small stones
- Broken terracotta pieces
- Coco husk chips or LECA balls
About 1–2 inches thick is enough for most pots. This layer will help water flow down and out easily, and keep roots above excess moisture.
Don’t use sand at the bottom — it clogs water instead of draining it.
3. Use a Light, Well-Draining Potting Mix
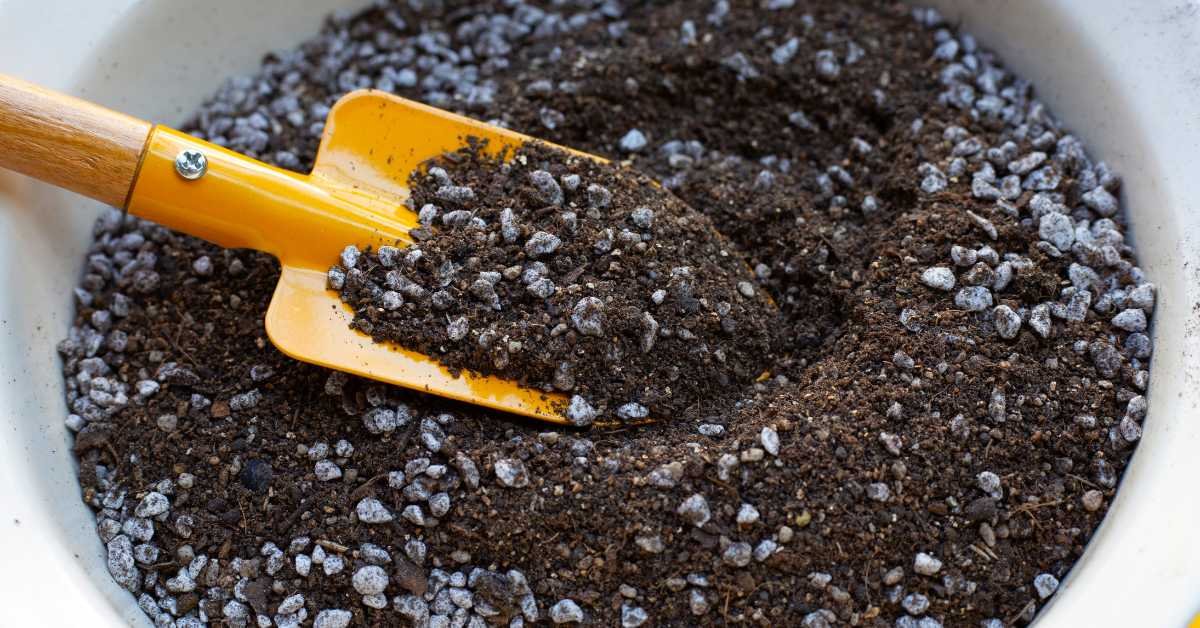
Drainage isn’t just about holes — it’s also about what’s inside the pot. Heavy garden soil traps water, so you need a light, airy mix that lets water flow but also keeps moisture for roots.
Here’s an easy DIY potting mix for balcony plants:
- 40% Cocopeat or coir fiber
- 30% Compost or organic manure
- 20% Perlite or vermiculite
- 10% Garden soil
If your existing soil feels too heavy or sticky, just mix in some perlite and cocopeat. It will instantly improve drainage.
Good potting mix = no more soggy soil. That’s the secret most beginners miss.
For full recipes and soil advice check best soil for balcony plants.
4. Keep Pots Slightly Raised (Don’t Let Them Sit Flat)
Even when pots drain properly, water can get trapped underneath if the bottom stays flat on the floor. The simple fix is to raise them slightly.
Use:
- Pot stands, small bricks, or risers
- Old tiles or plastic trays with legs
It allows air circulation under the pots and keeps the floor dry. It also prevents moss and water stains under pots, which can look bad later.
5. Use Trays the Right Way
Trays are good for catching water, but if you let water stay there, it becomes worse than not having one.
So whenever you use plant trays, make sure:
- They are not flat; a small raised center helps
- Water doesn’t stay inside for days
- You empty them after watering or rain
If your balcony gets heavy rain, you can even drill one tiny hole at the edge of the tray, so excess water escapes automatically.
Standing water invites mosquitoes and fungi — keep trays dry most of the time.
6. Check the Balcony Floor Drain
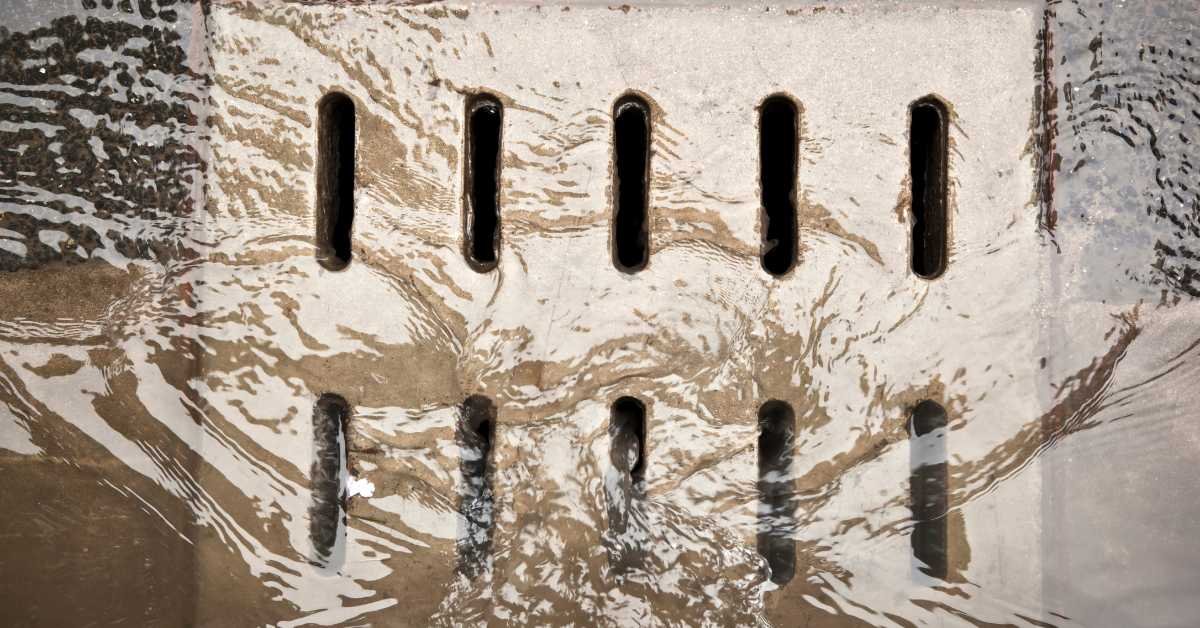
Even perfect pots won’t help if your balcony floor doesn’t drain properly. Water should naturally flow toward the main drain.
Do a small test — pour a bucket of water and watch how fast it goes. If it stays too long, that means your slope isn’t enough.
Fixes you can try:
- Use rubber mats or deck tiles to lift pots
- Keep the drain outlet clear of leaves or soil
- If needed, create a gentle slope with cement or tiles
Once you fix the floor flow, your entire setup becomes easier to maintain.
For tips on handling heavy rains and improving balcony runoff, see balcony garden rain tips.
7. Add Drainage Mesh Sheets
Many people skip this, but mesh sheets help a lot. They are very effective in preventing soil from blocking the holes. Moreover, it improves airflow at the bottom.
You can use:
- Ready-made drainage mesh sheets
- Old window nets
- Nylon fruit bag nets
Cut a small piece and place it at the bottom of every pot before adding the gravel layer. It keeps your mix clean and reusable for longer.
8. Handle Rainwater Properly
During the monsoon, you’ll notice extra water staying on the balcony corners or overflowing from pots. That’s where planning helps.
Try these:
- Keep large pots near railings so rainwater flows away easily
- Add a plastic sheet or small awning if your balcony floods often
- Check that trays don’t overflow
- Use gravel trays under plants that get too much rain
If your balcony doesn’t have a drain outlet, create a temporary drainage setup with a small pipe or hose that guides extra water toward a bucket or corner. It doesn’t have to be fancy — just functional.
9. Use Self-Watering Pots (Only If They Have Overflow Holes)
Self-watering pots are great when you travel or just don’t have enough time to do that. So, you should only choose the self-watering pots that have overflow holes.
Without holes, extra water stays trapped and kills roots.
These pots store a small amount of water in a bottom tank, which the plant drinks slowly through the soil. Perfect for herbs, succulents, or leafy greens.
But still, keep an eye on the water level once a week. Don’t let it stay full all the time.
If you want to build your own or compare options, follow the DIY self-watering balcony planters guide.
Don’t Forget Balcony Waterproofing
If your balcony leaks or stays damp from below, it’s not just drainage — it’s a waterproofing problem.
Before setting up your garden:
- Clean the floor well
- Apply a waterproof coating or sealant (cement-based or liquid)
- Let it dry for 2–3 days before putting the pots back
It protects your floor, prevents leakage to the apartment below, and keeps your garden safe even during heavy rain.
DIY Drainage Tricks That Actually Work
You don’t always need expensive tools. You can easily make homemade drainage systems with what you already have:
- Cut plastic bottles and poke holes to use as raised planters
- Keep old sponge pieces at the bottom of pots — they absorb just enough water
- Use egg trays or bricks to lift pots
- Add a thin gravel layer under racks to improve airflow
If you live in a rental, these are perfect because you can remove or adjust them anytime.
Know When Drainage Isn’t Working
If you see yellowing leaves, slow growth, or smell a musty odor, your drainage is failing.
Other signs:
- Water sits on top after watering
- Mold or algae on the soil
- White deposits near the pot bottom
- Tray water stays for days
What to do:
- Check the holes — unblock if clogged
- Replace heavy soil with a lighter mix
- Add perlite or cocopeat
- Lift the pot slightly higher
Once you fix it, you’ll notice plants look fresh again within days.
Adjust Drainage by Balcony Direction
Every balcony behaves differently, depending on sunlight and wind.
- North-Facing: Gets less sunlight, soil stays wet longer. Use extra perlite, water less often, and pick smaller pots.
- South or West-Facing: Hotter and drier. Add more cocopeat, deeper trays, and mulch on top to retain moisture.
- Covered Balcony: Since rain won’t reach, drainage isn’t much trouble, but holes can be blocked from dust — clean them monthly.
- High-Rise Balcony: Wind dries topsoil but bottom stays damp — mix LECA balls or small pebbles for airflow.
Ideal Balcony Drainage Setup (Step-by-Step)
Here’s a simple layout that fits almost every balcony garden:
- Pot with holes
- Drainage mesh sheet at the bottom
- 1-inch gravel layer
- Well-draining potting mix
- Pot riser or stand
- Tray with ridges
- The balcony floor sloped toward the drain
Once you build this pattern for all pots, your garden becomes clean and healthy automatically. You’ll notice how light the soil feels, and watering becomes easy — no puddles, no leaks.
For full setup ideas and how to place pots for best flow, check the balcony garden setup ideas.
Mistakes That Create Drainage Problems
Even experienced gardeners make these:
- Using normal garden soil in pots
- Not adding a drainage layer
- Overwatering daily without checking moisture
- Keeping trays full of water
- Blocking the main floor drain with planters
- Ignoring small leaks or damp marks on walls
Always remember: drainage problems grow slowly. You might not see them the first week, but roots are already struggling underneath.
Monthly Maintenance Routine
Every month, spend just 20 minutes checking your system:
- Lift pots and clean holes
- Empty and wash trays
- Add fresh compost or perlite if the soil feels heavy
- Check the balcony drain for dust or blockage
- Re-slope or adjust stands if needed
A small check like this keeps everything long-lasting, and you won’t have to redo the setup later.
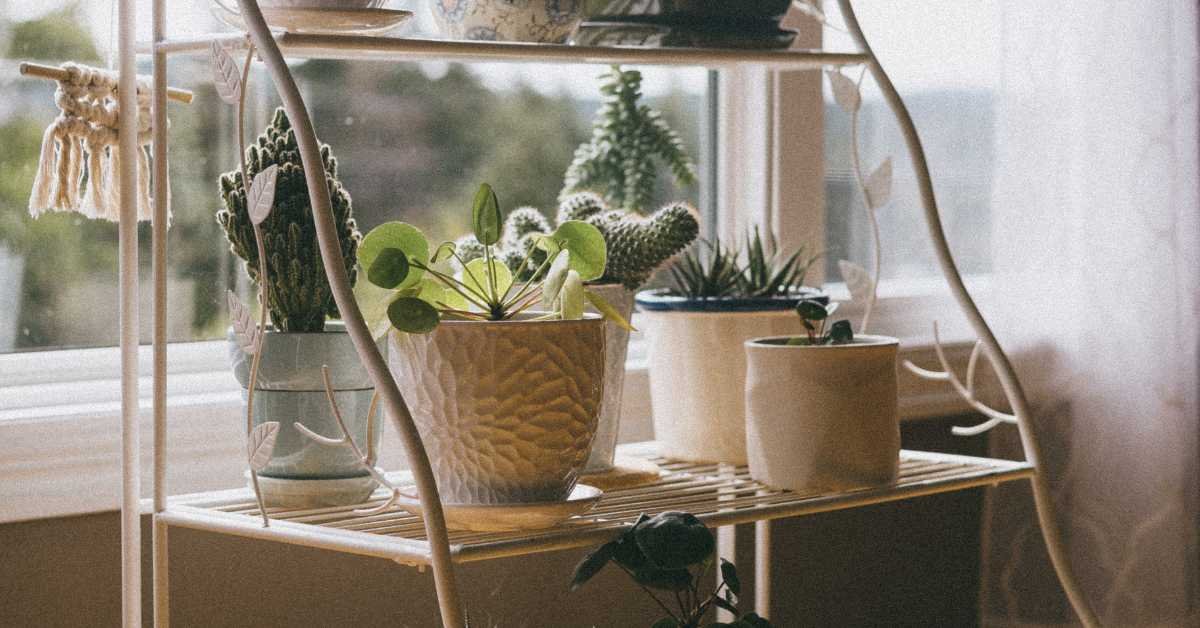
Accessories That Help You
If you want to keep things more organized:
- Plastic pot risers (great for airflow)
- Drainage mesh rolls
- LECA balls or perlite
- Stackable trays with ridges
- Deck tiles or plastic mats
These small tools save time and make watering easier. They’re also reusable, so it’s a one-time investment.
For Bigger Balcony Gardens
If you’re growing vegetables or have many pots:
- Add PVC pipes or gutter trays under racks to collect extra water.
- Use drain mats or slotted flooring tiles.
- Keep one side lower (toward the outlet) so water can flow naturally.
- If possible, you should connect long trays with a drain pipe. It will lead to the floor outlet.
This setup will keep your balcony clean, especially during the rain.
Final Thoughts
When you have good balcony garden drainage, your plants will have healthy roots, clean floors, and you won’t face any leaking problems.
These 18 balcony garden drainage solutions were not too expensive, so you can plan right, which is perfect for your balcony, and use that solution.
Once you fix drainage, you’ll see how easily your plants grow and how neat your balcony looks even after rain. It’s that simple: water in, water out — nothing stays stuck.
Keep your pots breathable, your floor sloped, and your mix light — that’s all you really need for a long-lasting, low-maintenance balcony garden.
FAQs
How do I know if my balcony pots have poor drainage?
If water stays on top after watering, or your soil always looks damp, that’s a clear sign. Also, if leaves turn yellow from the bottom up or roots smell bad when you pull a plant out — that’s drainage trouble.
Good soil should feel soft, not sticky, and water should pass through within seconds when you water.
Can I use normal garden soil in balcony pots?
No, avoid it. Garden soil is too heavy for containers; it traps water and suffocates roots.
For balcony pots, you need a light, airy mix — cocopeat, compost, perlite — that drains fast but still keeps some moisture.
If you have already used garden soil, just mix in perlite or cocopeat to fix it.
My balcony has no drain outlet. What can I do?
Don’t worry, you can still manage. Keep pots on trays or stands and place a small rubber mat or slope under one side, so water moves toward a corner.
You can even use a small pipe or flexible hose to direct extra water into a bucket.
Just make sure water never stays trapped on the floor.
How often should I clean the drainage holes and trays?
Once every month is enough. Lift your pots, clean holes with a stick or old toothbrush, and empty trays fully.
If you live in a rainy area, check them more often.
Small cleaning keeps drainage free-flowing and prevents root rot or mosquito growth later.

I’m Abraham creator of Balcony Gardening Ideas. I share balcony gardening tips, DIY projects, and hands-on plant care guides based on my own balcony garden experience. I grow vegetables, herbs, and flowers using organic methods and simple setups anyone can follow.